Update process
Since the most frequently updated device is Veronte Autopilot 1x, this user manual uses this device as an example. However, all other devices require the same procedure.
Within the same firmware version
Danger
To update a device within firmware versions 6.14 or higher, the connection must not be via the USB harness. For example, configure a connection via RS232 (users can use an RS232-to-USB adapter to connect it to the PC).
Since this user manual will use Autopilot 1x as an example, to configure it via RS232:
- Connect the device with Veronte Link 6.14 via USB harness. For more information on this app, refer to the Veronte Link user manual.
- Next, open 1x PDI Builder, select the connected device and open the PDI online.
- Go to Input/Output menu I/O Setup panel. Set up a bidirectional connection between RS232 port and a COM Manager port, in this case Commgr port 3 is used.

-
Go to Communications menu Ports panel.
Make sure that the COM Manager port configured in the previous step is set in the Forward column, in this case PORT 3.

- Save the configuration by clicking on the
 icon.
icon. - Finally, disconnect Autopilot 1x from the USB harness. The devide is ready to be updated with Veronte Updater 6.14.
Follow the steps below to carry out the update process of a Veronte Autopilot 1x:
-
Connect the device (to be updated) to a computer with Veronte Link in another way than USB.
Then, open Veronte Updater and select the connected device in the marked area:

Selecting connected device -
Load the .update file.
There are two ways to do this, dragging the file to the Drag area or by using the Select button.
The latter option will open the following browser to select the fw.update file stored in the user's local storage:

Loading file -
Once the .update file is loaded, click on Update to send the configuracion to the device.

Update loaded -
The update process will start, the next window will show the progress:

Update device process -
A confirmation panel will then appear to ensure that the user has not connected the device through the Veronte USB.

Update device process - Confirmation panel -
If the device is connected in a way other than USB, drag the blue arrow to the right until it turns green to confirm and the update process will continue.

Confirmation panel OK 
Update device process - Confirmed -
Otherwise, click cancel and the update process will stop:

Confirmation panel CANCEL 
Update device process - Cancelled
-
-
When finished, click on Done:

Update device process finished
Upgrade 6.12 to 6.14
Depending on the Veronte Autopilot 1x firmware version:
-
If the previous firmware version of Autopilot 1x is lower than 6.12.116, the update process will not be be able to proceed. Therefore, users first need to update it to 6.12.116.
Error
Upgrading an Autopilot 1x to 6.14 with firmware version lower than 6.12.116 will result in Autopilot 1x needing an RMA.
-
If Autopilot 1x is on 6.12.116 firmware version, the update process can start.
Danger
To update a device to firmware versions 6.14, the connection must not be via the USB harness. For example, configure a connection via RS232 (users can use an RS232-to-USB adapter to connect it to the PC).
Since this user manual will use Autopilot 1x as an example, to configure it via RS232:
- Connect the device with Veronte Link 6.14 via USB harness. For more information on this app, refer to the Veronte Link user manual.
- Next, open 1x PDI Builder 6.12, select the connected device and open the PDI online.
-
Go to Input/Output menu I/O Setup panel.
Set up a bidirectional connection between RS232 port and a COM Manager port, in this case Commgr port 3 is used.

-
Go to Communications menu Ports panel.
Make sure that the COM Manager port configured in the previous step is set in the Forward column, in this case PORT 3.

- Save the configuration by clicking on the
 icon.
icon. - Finally, disconnect Autopilot 1x from the USB harness. The devide is ready to be updated with Veronte Updater 6.14.
Follow the steps below to carry out the update process of a Veronte Autopilot 1x:
-
Connect the device (to be updated) to a computer with Veronte Link in a way other than USB.
Then, open Veronte Updater and select the connected device in the marked area:

Selecting connected device -
Load the .update file.
There are two ways to do this, dragging the file to the Drag area or by using the Select button.
The latter option will open the following browser to select the fw.update file stored in the user's local storage:

Loading file -
Once the .update file is loaded, click on Update to send the configuracion to the device.

Update loaded -
In the update process, a warning panel about the 4x configuration in Autopilot 1x appears first:

Update device process - Warning panel -
To prevent any error, users should check that the settings in the 4x modes menu in the Autopilot 1x are correct according to the case.
For this:
- Close the warning message, close Veronte Updater app and open 1x PDI Builder v6.12.
- Go to Modes menu Modes panel 4xVeronte tab.
Depending on the case:
- If Autopilot 1x is not apart of a 4x, the configuration in the 4x Veronte tab should be disabled.
- If Autopilot 1x is within a 4x, the configuration in the 4x Veronte tab should be as explained in the Autopilot 4x - Integration examples section of the 1x PDI Builder user manual.
-
If the configuration has been previously checked and it is correct, click OK and continue the process.
Error
If users perform the update process with this configuration incorrectly, the migration to 6.14 will lead Autopilot 1x to a Loaded with errors status. Users can find a solution to this in the Incorrect configuration when upgrading from 6.12 to 6.14 - Troubleshooting section of the present manual.
-
-
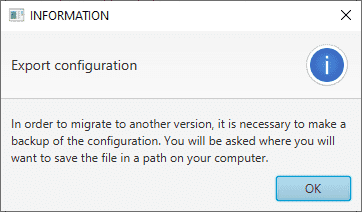
If the update process can continue, the following message will appear. This is because updating a device will format it and a backup is the only way to restore the previous configuration.
This configuration file will be needed later.

Export configuration message
-
Choose the folder where the backup will be stored as a .backup file:

Save .backup file -
The update process will start, the following windows will show the progress:

Update device process -
A confirmation panel will then appear to ensure that the user has not connected the device through the Veronte USB.

Update device process - Confirmation panel -
If the device is connected in a way other than USB, drag the blue arrow to the right until it turns green to confirm and the update process will continue.

Confirmation panel OK 
Update device process - Confirmed -
Otherwise, click cancel and the update process will be cancelled:

Confirmation panel CANCEL 
Update device process - Cancelled
-
-
When finished, click on Done:

Update device process finished Note
During the update the device has been formatted and consequently the Autopilot 1x configuration has been deleted.
Therefore Veronte Link will show it as Maintenance mode and PDIF: Failed load.

Veronte Link - Failed load -
Finally, upload the .backup file obtained in step 6.
Use the Upload backup tool of Veronte Updater. For this:
-
Click on Advanced tools Upload backup.

Upload backup -
Load the .backup file. There are two ways to do this, dragging the file to the Drag area or by using the Select button.
The latter option will open the following browser to select the .backup file stored in the user's local storage:

Upload backup - Select .backup file -
Once the .backup file is loaded, click on Update to send the configuracion to the device.

Upload backup - Upload -
Once the process, finish, click on Done.

Upload backup - Upload process
-
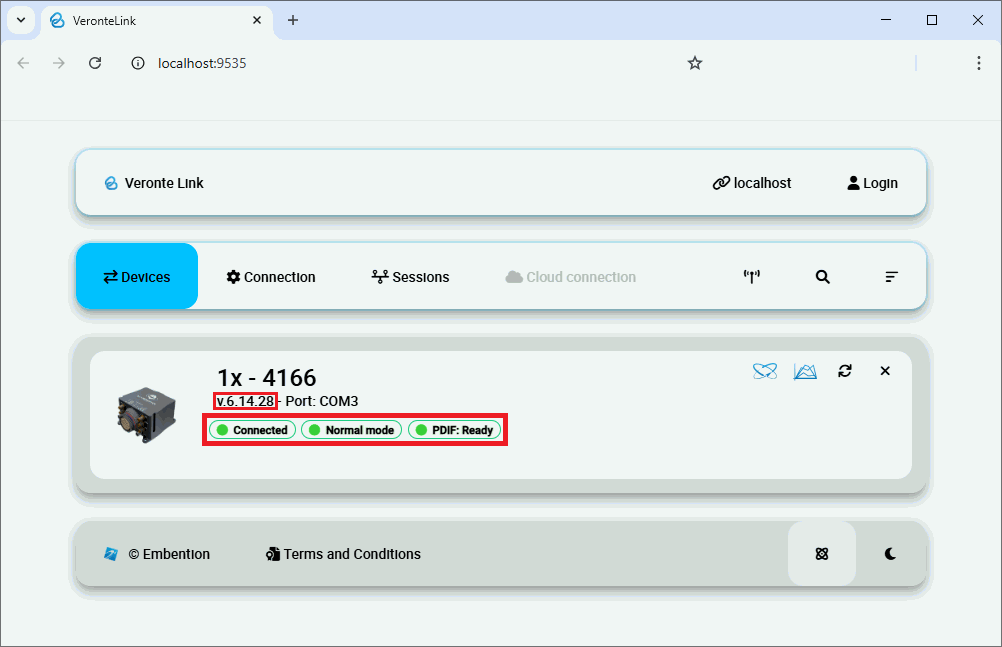
Autopilot 1x should now be in version 6.14 with the migrated PDI and switch to Normal mode and Ready status:

Autopilot 4x
To update an Autopilot 4x, the 3 Autopilots 1x and the Arbiters, it is necessary to start the process by updating first the Autopilots 1x.
Autopilots 1x within the 4x
When updating an Autopilot 1x within a 4x from firmware version 6.12 to 6.14, users should carefully follow these additional steps, in addition to those already explained for updating a device from 6.12 to 6.14 in the previous section.
Note
Each Autopilot 1x has to be updated individually.
- First, connect Dev Harness 4x to Autopilot 4x, power up the 3 Autopilots 1x and connect them to PC via USB.
- Check that the configuration of RS232 connection of all autopilots is correctly done as detailed in the Upgrade 6.12 to 6.14 section.
-
Users can now unplug the Autopilots 1x and disconnect all USB from the PC.
-
Now, connect Veronte Harness Yellow to Autopilot 4x, power up it and connect it to the PC.
- Open 4x PDI Builder app, select the connected Autopilot 4x and click the Open 4xVeronte option to access its configuration.
-
Go to Arbitration menu Config panel. In this panel users must set the Autopilot 1x to be updated as Fixed. The relations between mode and Autopilots 1x are as follows:
Mode Autopilot 1x Fixed 0 Autopilot 1 Fixed 1 Autopilot 2 Fixed 2 Autopilot 3 That is, if we want to update Autopilot 1, the metod Fixed 0 should be set.
-
Save the configuration by clicking on the
 .
. - Connect Autopilot 4x to PC via the RS232 connector of the Dev Harnes 4x
-
Now, it is necessary to force Autopilot 4x to maintenance mode. For this:
- With Autopilots 1x unplugged (that is, with Dev Harnes 4x unplugged), connect the I2C pins or press the mainteance mode button of Dev Harness 4x (depending on the user harness).
-
Turn on only Autopilot 1. Don't power up Autopilots 2 and 3 to avoid arbitration initialization.
Note
If the Autopilot 1x being updated is Autopilot 2, turn un only Autopilot 2, and the same for Autopilot 3.
-
Finally, disconnect both pins or release the button (depending on the user harness).
-
Only Autopilot 1 should be recognized by Veronte Link.
- Finally, follow the steps detailed in the Upgrade 6.12 to 6.14 section to update it.
Autopilot 1 should be correctly migrated to 6.14 firmware version.
Then, to update Autopilots 2 and 3 repeat the process from step 4, in each case configuring the arbiter to the corresponding mode.
For more information on the harnesses, please refer to Harnesses - Hardware Installation of the 4x Harware Manual.
Arbiters within the 4x
The process for upgrading Arbiter A is the same as that explained in the Upgrade 6.12 to 6.14 section; no further steps are needed.
© 2025 Embention. All rights reserved.